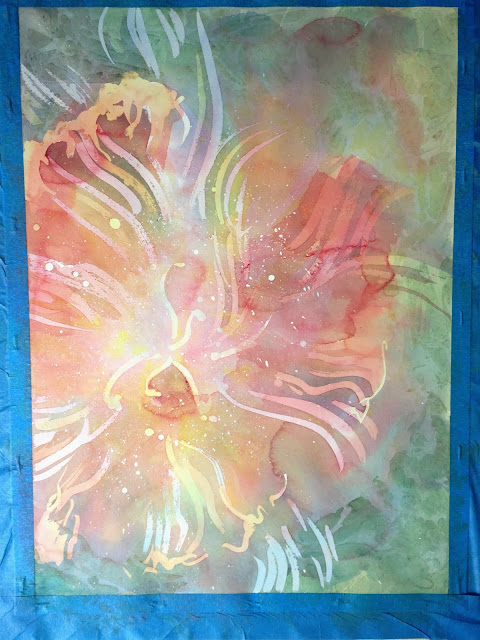
So, finally, some success with the masking fluid! I've ruined a few paintings in the past with masking fluid, and never could figure out why. I was getting a bit of tearing whenever I would try and lift it.
So, I read a bit on how to use it, and discovered that the most common reasons for failure were either 1) that it was an old bottle that had separated too much (mine was almost 3 years old), 2) that it was the Windsor & Newton brand of masking fluid (which mine was) or 3) that you either applied it while the paper was still even a little bit damp (I often did), or 4) that you removed it before it was totally and completely dry (I did this too). So, no wonder I'd been failing.
Anyways, this time me and Tasha practiced splattering the fluid, and painting some marks. I would do this one night then paint the next day. Peel in the evening, then paint again. Splatter in the morning then paint in the evening, etc. So far, the experiment has been fun! And all in the all the painting might be considering successful.
- Here's the first step, with the masking fluid still largely on in an number of areas. It's where it looks very orange and kind of shiny. I just did a wet, playful, loose wash in the background and let it run. Black bleeds occurred where the watercolor was caught and trapped by the masking fluid!
2. I laid down the first set of yellow-green washes in what would become the background. Me and Tasha recently played with plastic wrap (Xmas red!) and watercolors, in a bout of experimentation and internet research. Fun stuff! Makes amazing, random, natural shapes and patterns. Pardon the cooky perspective.
3. Here you can see the beginnings of of the background patterns. I've also begun to peel off some of the masking fluid- but not all of it! I decided to go for a more mottled, varied look, by removing different areas of masking fluid and painting on different layers at different times.
4. Here you can see background after I've punched in 2-3 layers of blue green, as well as a few more applications of plastic wrap. All the masking fluid is now off too. Here I've also begun to map out the shape of the flower more-- I put some blues around its edges, as if it were lit from the center, and I've dropped in some more red and yellow into the center, to draw the eye in.
5. All done. Here I've added some streaks of blue-green into the flower itself, to push the sense of emanating light through some cast shadows, as well as to define the sense of the crenulated (??a word??) texture. I've also done a few more washes in various corners to add a sense of background light coming from one direction.


